Spring Boot Admin郵件警報(bào)整合過(guò)程解析
一、前言
在Spring Boot Admin Server 中撒送預(yù)警郵件通知是很簡(jiǎn)單的,只需要簡(jiǎn)單的幾個(gè)配置就可以了。
二、代碼演示
1、microservice-monitor-server-> pom.xml
<?xml version='1.0' encoding='UTF-8'?><project xmlns='http://maven.apache.org/POM/4.0.0' xmlns:xsi='http://www.w3.org/2001/XMLSchema-instance' xsi:schemaLocation='http://maven.apache.org/POM/4.0.0 http://maven.apache.org/xsd/maven-4.0.0.xsd'> <parent> <artifactId>microservice-minitor</artifactId> <groupId>com.microservice</groupId> <version>1.0-SNAPSHOT</version> </parent> <modelVersion>4.0.0</modelVersion> <artifactId>microservice-monitor-server</artifactId> <dependencies> <dependency> <groupId>org.springframework.boot</groupId> <artifactId>spring-boot-starter-web</artifactId> </dependency> <dependency> <groupId>de.codecentric</groupId> <artifactId>spring-boot-admin-starter-server</artifactId> <version>2.2.0</version> </dependency> <dependency> <groupId>org.springframework.cloud</groupId> <artifactId>spring-cloud-starter-netflix-eureka-client</artifactId> </dependency> <dependency> <groupId>org.springframework.boot</groupId> <artifactId>spring-boot-starter-security</artifactId> </dependency> <dependency> <groupId>org.springframework.boot</groupId> <artifactId>spring-boot-starter-mail</artifactId> </dependency> </dependencies> <build> <plugins> <plugin><groupId>org.springframework.boot</groupId><artifactId>spring-boot-maven-plugin</artifactId> </plugin> </plugins> </build></project>
其中改動(dòng)的只是添加了spring-boot-starter-mail 的依賴
2、microservice-monitor-server-> application.yml
server: port: 8888spring: application: name: SpringBootAdmin boot: admin: ui: title: SpringBootAdmin-Server notify: mail: from: 123@qq.com to: 345@outlook.com security: user: name: 'admin' password: 'admin' mail: host: smtp.qq.com username: 123@qq.com password: qq #授權(quán)碼 properties: mail: smtp: auth: true starttls: enable: true required: trueeureka: instance: hostname: localhost metadata-map: user.name: ${spring.security.user.name} user.password: ${spring.security.user.password} client: register-with-eureka: true fetch-registry: true serviceUrl: defaultZone: http://localhost:8001/register/eureka/
只需要兩步就配置完成,根本就沒(méi)有編寫任何的Java的代碼,只需簡(jiǎn)單的配置就可以了。
三、運(yùn)行測(cè)試
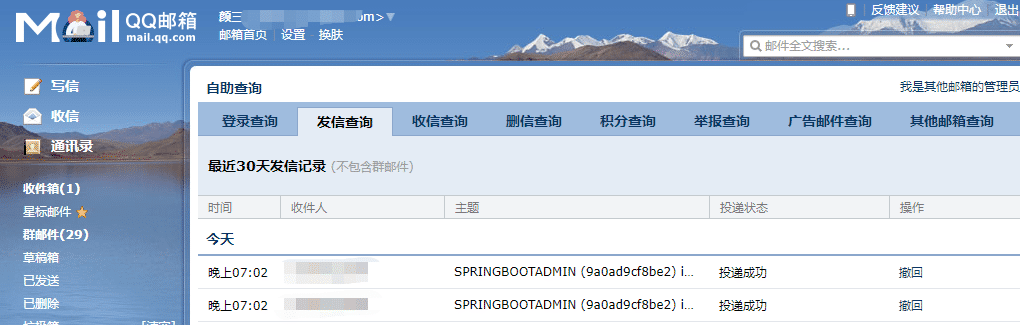
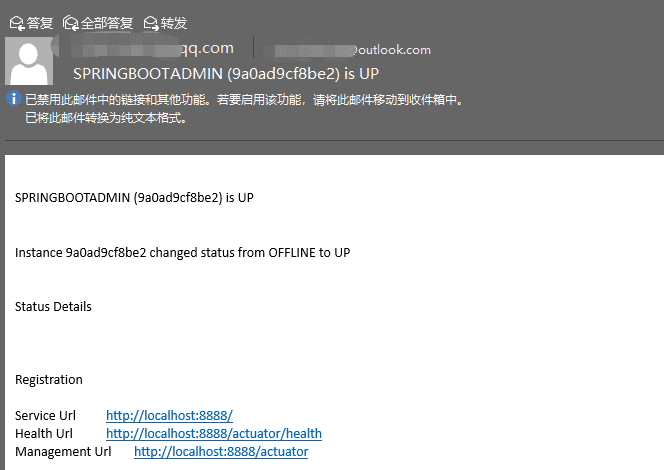
能夠正常的發(fā)送接收郵件!
以上就是本文的全部?jī)?nèi)容,希望對(duì)大家的學(xué)習(xí)有所幫助,也希望大家多多支持好吧啦網(wǎng)。
相關(guān)文章:
1. IntelliJ IDEA設(shè)置自動(dòng)提示功能快捷鍵的方法2. 通過(guò)Django Admin+HttpRunner1.5.6實(shí)現(xiàn)簡(jiǎn)易接口測(cè)試平臺(tái)3. Docker 部署 Prometheus的安裝詳細(xì)教程4. IntelliJ IDEA安裝插件的方法步驟5. idea導(dǎo)入maven項(xiàng)目的方法6. idea重置默認(rèn)配置的方法步驟7. idea給項(xiàng)目打war包的方法步驟8. idea打開多個(gè)窗口的操作方法9. php過(guò)濾器使用詳解10. IntelliJ IDEA調(diào)整字體大小的方法
 網(wǎng)公網(wǎng)安備