Vue自定義多選組件使用詳解
本文實(shí)例為大家分享了Vue自定義多選組件使用的具體代碼,供大家參考,具體內(nèi)容如下
子組件(選項(xiàng)卡)
checkBoxCard.vue
<template> <div class='checkBoxCard'> <div : @click='checked(), updateData()'> {{ name }} </div> </div></template><script>export default { name: 'checkBoxCard', props: { name: String, checkIndex: { type: Number, default: null, }, }, data() { return { radio: 0, check: false, radioName: '', list: [], }; }, methods: { checked() { if (this.radio == 1) { this.check = false; this.radio = 0; } else if (this.radio == 0) { this.check = true; this.radio = 1; } }, updateData() { if (this.radio == 1) { this.radioName = this.name; } else if (this.radio == 0) { this.radioName = ''; } this.$emit('updateSurveyData', this.radioName, this.checkIndex); }, }, mounted() {}, created() {},};</script><style lang='scss' scoped>.checkBoxCard { margin-right: 15px; display: inline-block; margin-top: 10px;}.boxCheck { color: rgba(183, 37, 37, 1); background: bisque;}.box { border: 0.55px solid #eee; padding: 5px 10px; font-size: 3.73333vw; border-radius: 10px;}</style>
父組件
checkBox.vue
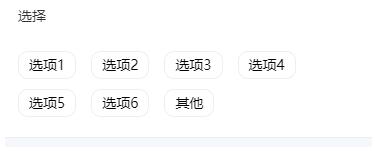
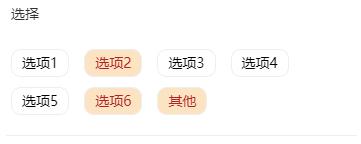
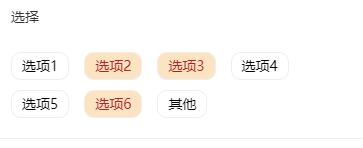
<template> <div class='checkBox'> <div class='title'> 選擇 </div> <div class='card'> <CheckBoxCard v-for='item in list' :key='item.value' :name='item.name' :checkIndex='item.value' @updateSurveyData='updateSurveyData' /> </div> </div></template><script>import CheckBoxCard from './checkBoxCard';export default { name: 'checkBox', components: { CheckBoxCard, }, data: function () { return { list: [ { value: 0, name: '選項(xiàng)1' }, { value: 1, name: '選項(xiàng)2' }, { value: 2, name: '選項(xiàng)3' }, { value: 3, name: '選項(xiàng)4' }, { value: 4, name: '選項(xiàng)5' }, { value: 5, name: '選項(xiàng)6' }, { value: 6, name: '其他' }, ], name: '', checkList: [], }; }, methods: { updateSurveyData(question, index) { this.checkList[index] = question; console.log(this.checkList.filter((x) => x != '')); console.log(this.checkList.filter((x) => x != '').join()); }, }, created() {},};</script><style scoped>.checkBox { padding: 5.33333vw 4vw; border-bottom: 0.55px solid #eee; background: white;}.title { text-align: left; color: #323233; font-size: 3.73333vw; padding-bottom: 10px; line-height: 30px;}</style>
效果圖
以上就是本文的全部?jī)?nèi)容,希望對(duì)大家的學(xué)習(xí)有所幫助,也希望大家多多支持好吧啦網(wǎng)。
相關(guān)文章:
1. IntelliJ IDEA導(dǎo)入jar包的方法2. 基于Java實(shí)現(xiàn)記事本功能3. docker鏡像完全卸載的操作步驟4. idea刪除項(xiàng)目的操作方法5. IntelliJ IDEA配置Tomcat服務(wù)器的方法6. IntelliJ IDEA設(shè)置自動(dòng)提示功能快捷鍵的方法7. idea打開(kāi)多個(gè)窗口的操作方法8. 使用Maven 搭建 Spring MVC 本地部署Tomcat的詳細(xì)教程9. idea導(dǎo)入maven項(xiàng)目的方法10. IntelliJ IDEA設(shè)置默認(rèn)瀏覽器的方法
 網(wǎng)公網(wǎng)安備